

What You Need Before Starting
BesTest brings requirement and test management directly into Jira: requirements, test cases, test cycles, and reporting in one place, with no separate tool to log into. It's built on Atlassian Forge, stores test data as its own entities instead of Jira issues (so your backlog stays clean), and it's free for teams of up to 10 users. This guide takes you from installation to your first executed test in about 15 minutes.
Want to click around before installing anything? The live demo runs the real app with sample data.
What you need
- •A Jira Cloud site. BesTest is a Jira Cloud app. A free Jira Cloud site works fine for an evaluation.
- •Admin rights to install. Installing a Marketplace app needs a Jira or site admin. If that's not you, send your admin the Marketplace link.
- •A Space to test in. Any Jira Space type works (Scrum, Kanban, team-managed). Enabling BesTest on it needs a Space admin.
Four words you'll see in this guide
| Concept | What it means |
|---|---|
| Requirement | A feature or behavior the software must have |
| Test case | A set of steps that verify a requirement works |
| Test cycle | A planned run of one or more test cases |
| Coverage | Whether a requirement has enough linked test cases for how much it matters |
Time: installation takes 2-3 minutes, enabling BesTest on a Space takes about a minute, and creating your first requirement, test case and execution takes the rest.
Installing BesTest from Atlassian Marketplace
Install the app
- 1
- 2Click "Get it now" (or "Try it free" if shown)
- 3Select your Jira Cloud site and confirm
- 4Wait for the installation to finish - usually under a minute
Jira admins can also find BesTest - Requirement & Test Management by searching Jira's own app marketplace under Settings > Apps.
Open it and allow access
BesTest appears in the global Apps menu at the top of Jira and in the Space menu bar at the top of each Space. The first time each user opens it, Jira asks them to press Allow access - that's the only step for users.
Enable BesTest on your Space
A Space admin turns BesTest on once per Space:
- 1Open the Space and click BesTest in the Space menu bar
- 2If BesTest is not enabled yet, flip the Enable BesTest switch on the screen that appears
You can also do it from Space settings > BesTest > App Settings. It takes about a minute. People who aren't Space admins see a note asking them to contact one.
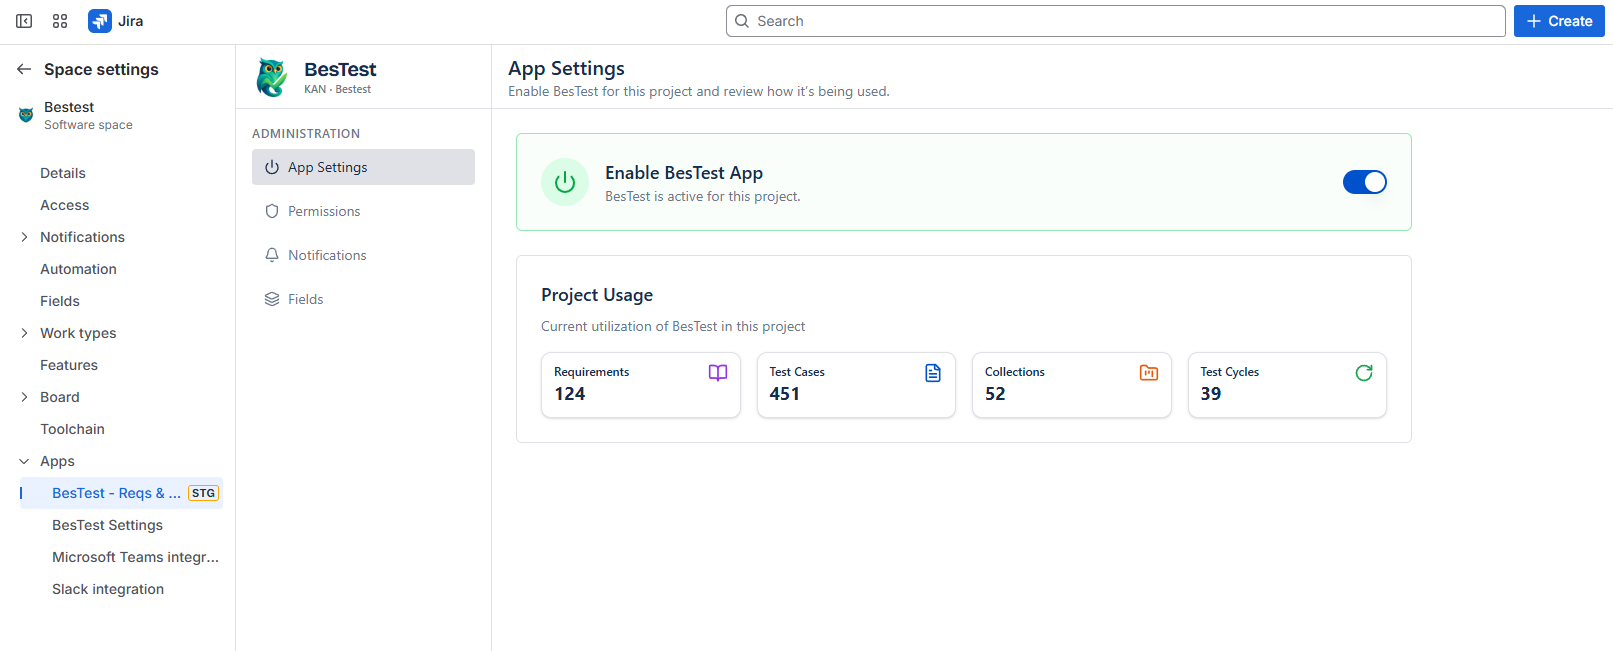
More detail: Installation and Enable BesTest for a Space.
Initial Configuration and Space Setup
BesTest works out of the box, so configuration is mostly a quick look around.
Find your way around
Open BesTest from the Space menu bar. The BesTest menu has:
- •Dashboard: your work and the Space at a glance
- •Requirements: what the software must do
- •Test Cases: the steps that verify each requirement
- •Test Cycles: planned rounds of execution
- •Collections: reusable sets of test cases for building cycles quickly
- •Reports: coverage, execution and defect reports, plus test campaigns
Every catalog has folders, search and filters, and the Create button creates any of them.
Decide on reviews (optional)
In Space settings > BesTest > Reviews, a Space admin chooses whether test cases and requirements must be reviewed: Off, Optional or Required. Leave the default for now - you can switch it on later. See the test case review tutorial.
Notifications
BesTest sends in-app notifications for reviews, cycle and test assignments, finished cycles and @mentions. Adjust yours under the bell icon.
The typical flow from here is:
Requirements → Test Cases → Test Cycles → Execution → ResultsYou don't have to follow it rigidly - you can write test cases first and link requirements later.
Creating Your First Requirement
Requirements are the "what" your test cases verify. Creating them first gives you coverage from day one: you'll see which requirements have enough tests, and where the gaps are.
Step-by-step: create a requirement
- 1In BesTest, go to Requirements
- 2Click "Add Requirement"
- 3Fill in the General tab:
| Field | Example value |
|---|---|
| Name | User can log in with email and password |
| Description | Registered users log in with their email address and password. Valid credentials redirect to the dashboard. |
| Requirement Type | Functional |
| Significance | Impact High, Complexity Medium |
- 4Click "Save Requirement"
Impact and Complexity (Low / Medium / High) together give the requirement its significance - here High - and significance decides how many linked test cases it needs to count as covered: Low 1, Medium 3, High 5, Critical 8.
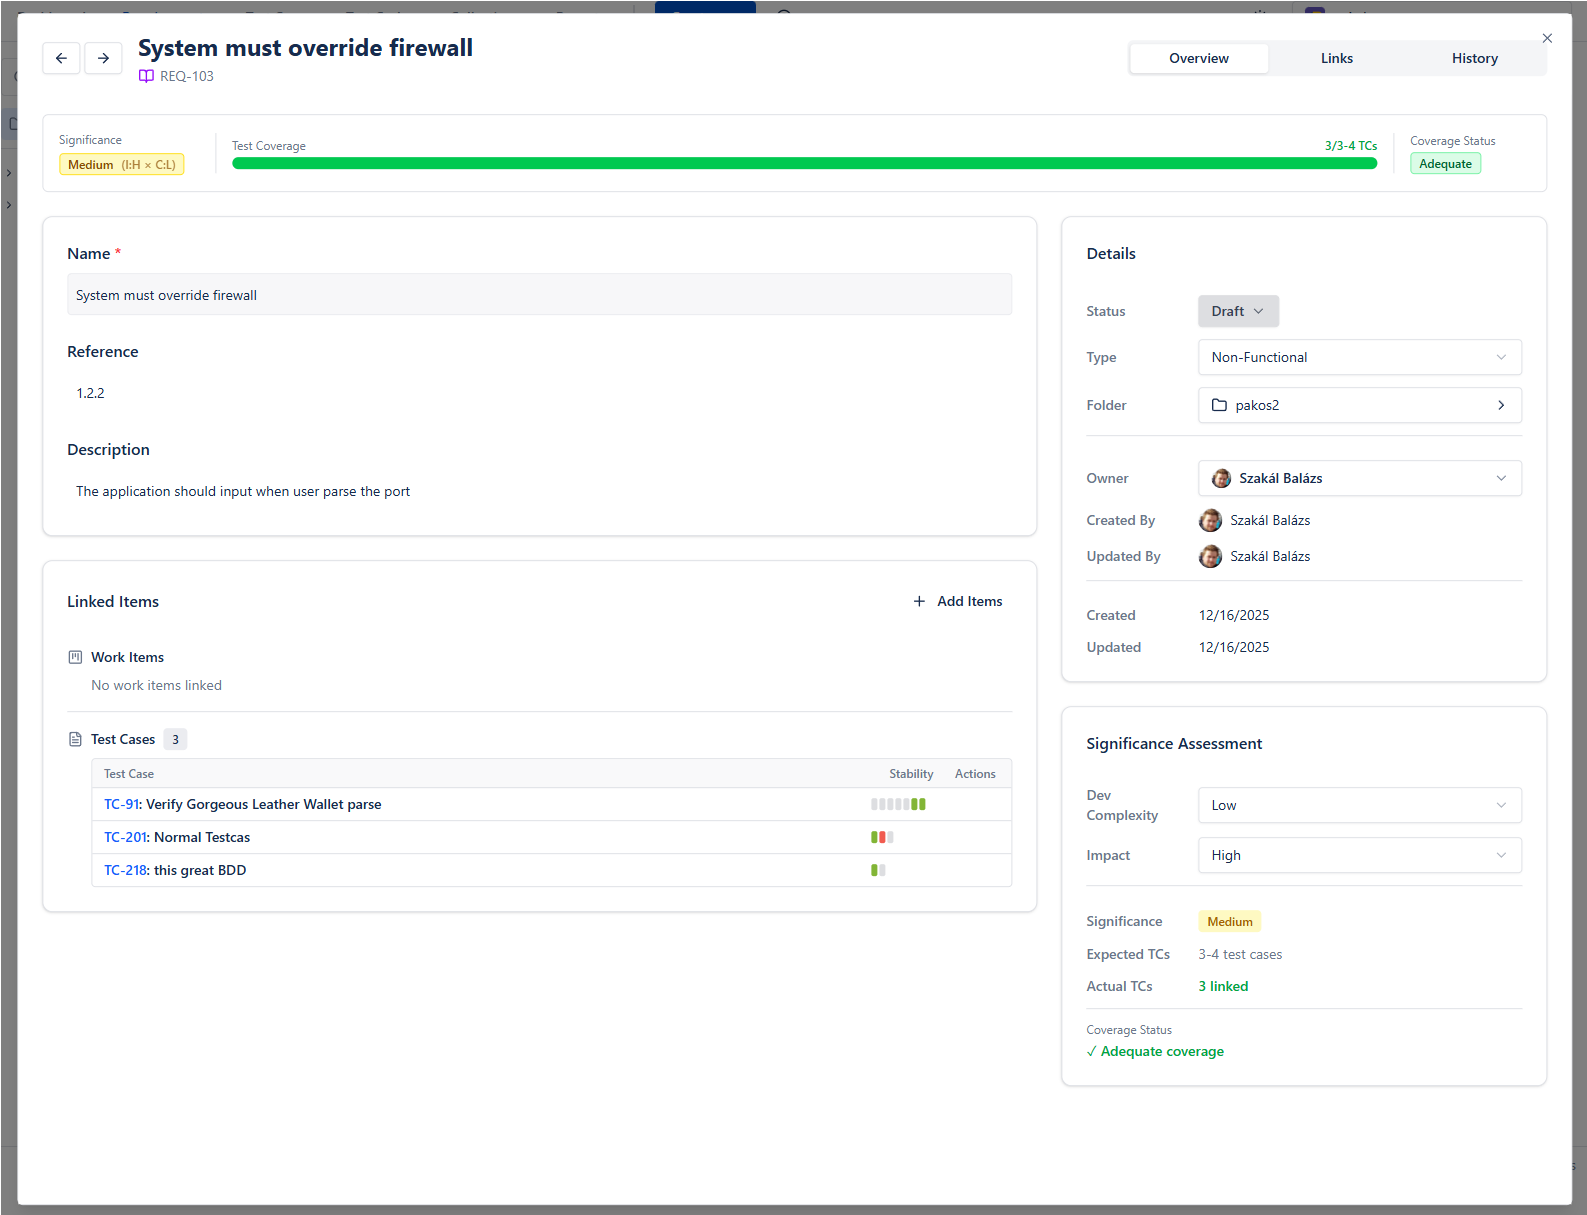
Link it to a Jira work item
Connect the requirement to the story or epic it comes from:
- 1Open the requirement and go to the Links tab
- 2Click "Add Links", pick the work item, and confirm
The link shows on both sides: in BesTest and in the BesTest panel on the Jira work item.
Open the menu next to Add Requirement and choose Create in bulk: one name per line, shared fields set once. You can also bulk create from the BesTest panel on a Jira work item (everything created there is linked to it), or import from CSV. See Create in bulk.
Writing Your First Test Case
Now write a test case that verifies the requirement.
Step-by-step: create a test case
- 1Go to Test Cases and click "Add Test Case"
- 2Fill in the General tab:
| Field | Example value |
|---|---|
| Name | Verify successful login with valid credentials |
| Description | A registered user logs in with the correct email and password and lands on the dashboard. |
| Pre-conditions | A registered account with known credentials exists. The user is logged out. |
| Format | Traditional (choose BDD to write Gherkin instead) |
- 3Switch to the Test Steps tab and add the steps. Each step has a Test step, optional Test data and an Expected result. Press Tab in the last Expected result to add the next step; drag a step (or Alt + ↑ / ↓) to reorder.
| # | Test step | Expected result |
|---|---|---|
| 1 | Open the login page | The login form shows email and password fields |
| 2 | Enter a registered email address | The field accepts it without errors |
| 3 | Enter the correct password | The password is masked |
| 4 | Click Log In | You land on the dashboard and see your name in the header |
- 4Click "Save Test Case"
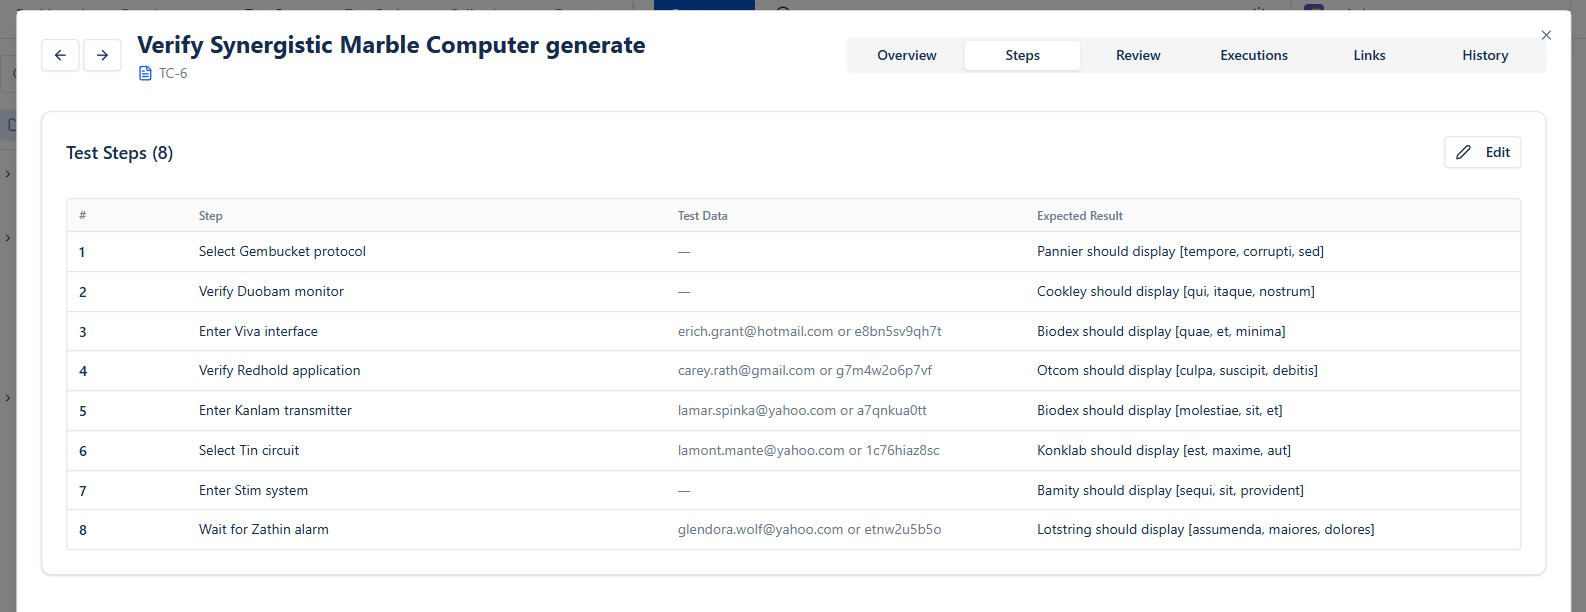
Best practices for test steps
- •One action per step, so a failure points at one place
- •Specific inputs: "Enter testuser@example.com" beats "Enter a valid email"
- •Observable expected results: "Dashboard shows 'Hello, Test User'" beats "Page loads correctly"
- •Preconditions: state everything that must be true before step 1
More on the editor and BDD: Test Cases and BDD (Gherkin). For a writing guide, see How to Write Test Cases.
Linking Requirements to Test Cases
Linking is what turns two separate items into traceability. Once a requirement has linked test cases, BesTest works out its coverage by itself.
Method 1: From the requirement
- 1Open the requirement you created
- 2In the Traceability card on the Overview tab, click "Add Existing"
- 3Search for your test case by name or key, select it and confirm
"Create & Link" in the same card creates new test cases (one name per line) that are linked straight away.
Method 2: From the test case
- 1Open the test case
- 2Go to the Links tab and click "Add Links"
- 3Pick the requirement and confirm
Both create the same two-way link.
Reading coverage
Back in Requirements, the Coverage column shows one of three values:
- •Covered: enough linked test cases for the requirement's significance
- •Partly covered: some linked, but fewer than its significance needs
- •Not covered: no linked test cases
Your example requirement has High significance and one linked test case, so it shows Partly covered - the Coverage card on its Overview reads "Test cases: 1 linked of 5 needed". That's the point of the model: an important requirement needs more than one happy-path test.
If you know better than the count (for example the requirement is tested elsewhere), click the coverage chip and set Decision to Covered or Not covered. A hand icon shows that a person decided. More in Requirements.
Aim for every requirement to be Covered. Use the Coverage filter in the Requirements catalog to list the gaps.
Running Your First Test Execution
Time to run the test and record the result.
Create a test cycle
A test cycle is a planned run of one or more test cases.
- 1Go to Test Cycles and click "New Test Cycle"
- 2On the General tab, fill in:
| Field | Example value |
|---|---|
| Name | Sprint 1 - Login |
| Description | Verify login for the Sprint 1 release |
| Planned Start / Planned End | Today / one week from today |
| Status | Ready to Execute (or leave Draft and change it later) |
- 3Open the Test Cases tab, check your test case and click "Add Selected"
- 4Check the Planning tab (assign a tester here if you like) and click "Save Test Cycle"
Execute the test
Results can only be recorded once the cycle is Ready to Execute. If you left it in Draft, open the cycle and change its status first.
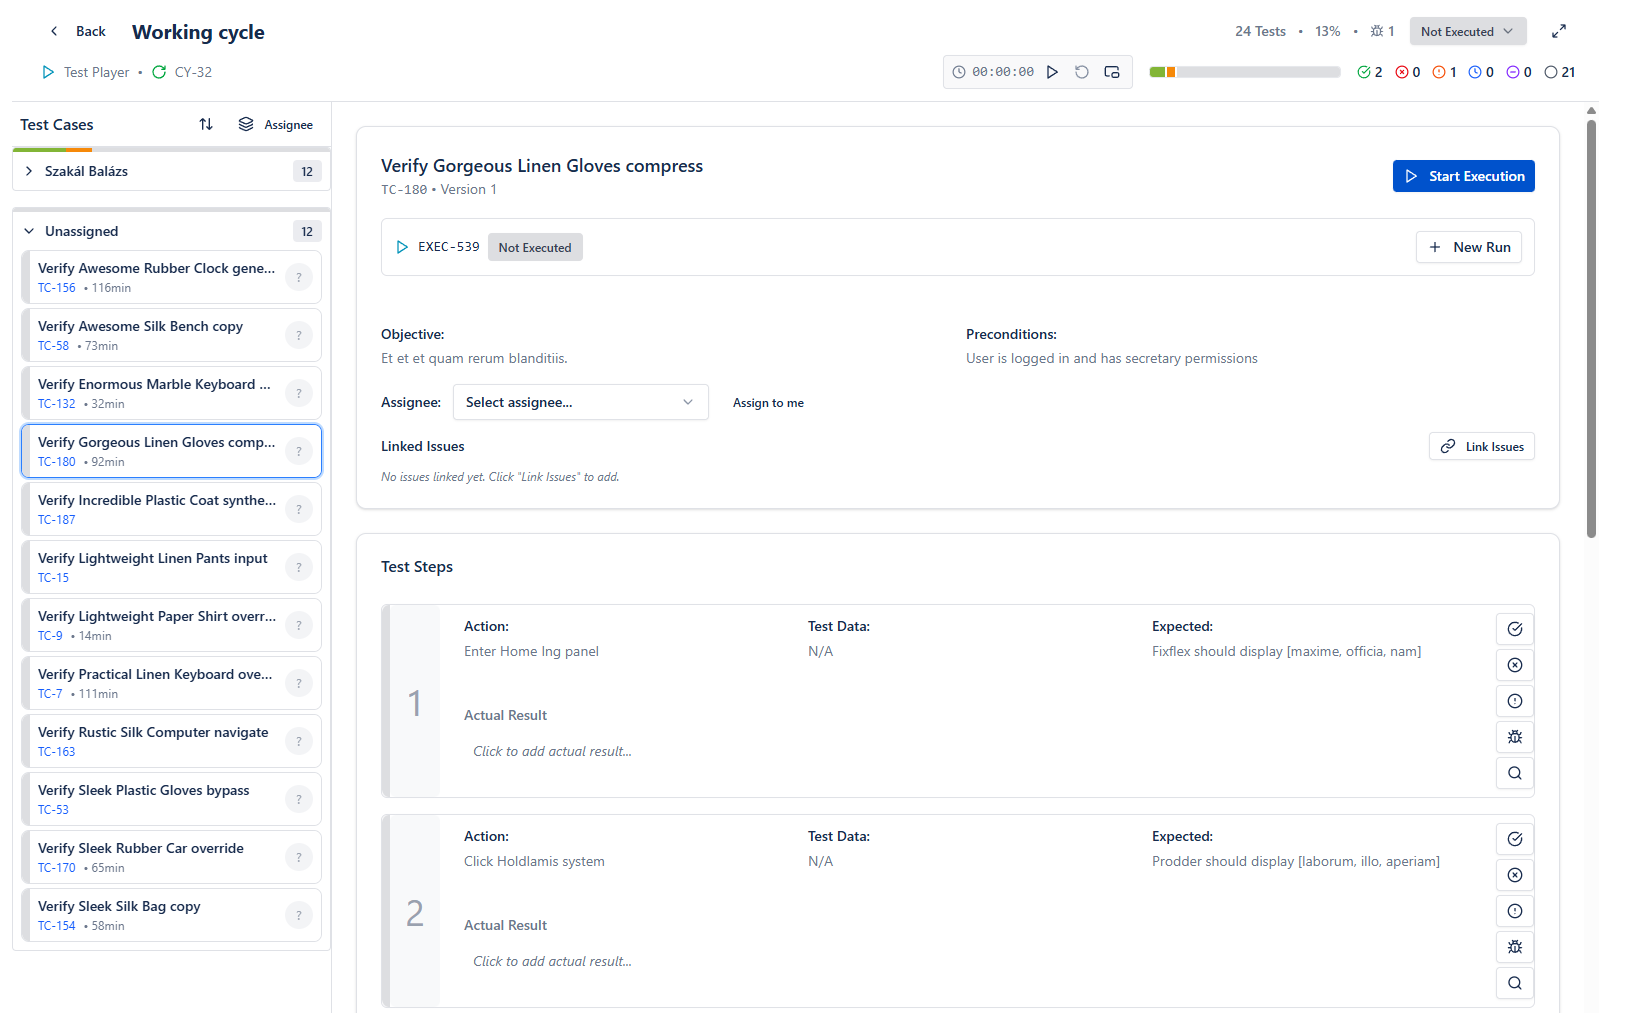
- 1Click "Open Test Player" in the confirmation message, or "Test Player" on the cycle's Overview
- 2Select your test case on the left (or press Next to do) and click "Start Execution" - the test case is assigned to you and the timer starts
- 3For each step, do the action, compare with the expected result and mark the step Passed, Failed or Blocked. Add a note if something is worth recording.
- 4The test case result follows from the step results; you can also set it directly (keyboard: P, F, B, S)
Capture evidence
BesTest has no attachments of its own. When you need a screenshot or log, create or link a Jira work item from the step and attach the file there - it stays connected to the execution.
With hundreds of runs, use the search (keys, names, execution notes), My work (only your test cases) and the filter panel (has bugs, tends to fail, over time and more). Next to do (keyboard N) jumps to the next open test. See Test Player - Execution.
Reviewing Test Results
BesTest records every step result, note, time spent, tester and timestamp.
Where to look
- •The cycle's Overview: execution progress, pass rate and results per status
- •The cycle's Executions tab: every run in the cycle
- •The test case's Executions tab: the history of one test case across cycles
- •Reports: for example Test Execution Results, Defect Analysis and the Requirements Traceability Matrix (coverage, latest results and linked bugs per requirement, with a risk level). Reports export to PDF. See Reports.
When a test fails
- 1Review the failure: which step failed, and what actually happened
- 2Log a defect: on the failed step, click Create Work Item. BesTest opens the Jira create form as a Bug, pre-filled with the test case key, the step, and the expected vs. actual result, and links the new bug to the execution
- 3Track the fix in your normal Jira workflow
- 4Re-test: start a New Run of the test case in the same cycle. If the cycle was already Done, this reopens it, and it closes again when every run has a result
That gives you a complete chain:
Requirement → Test Case → Test Execution (Failed) → Jira BugSo you can answer "which requirement does this bug affect?" and "was the fix re-tested?" without digging.
After each cycle, ask: were the test cases clear? Did we test the right things? What should we add? Small fixes each cycle add up.
Introduction to Smart Collections
Once you have more than a handful of test cases, Smart Collections save you from picking test cases by hand for every cycle.
A collection (Collections in the BesTest menu) combines up to three sources:
- •Rules: a filter on test cases, for example "everything in the Regression folder with priority High or Critical". New matching test cases are picked up automatically.
- •Requirements: the test cases linked to the requirements you pick.
- •Test Cases: a hand-picked, fixed set.
| Collection | Built from | Use case |
|---|---|---|
| Regression Suite | Rule: the "Regression" folder and its subfolders | Full regression before release |
| Billing Module Tests | Requirements: the Billing requirements | Module-specific testing |
| High-Priority Tests | Rule: priority High or Critical | Quick smoke test |
When you create a cycle, add a whole collection on the Collections tab instead of selecting test cases one by one.
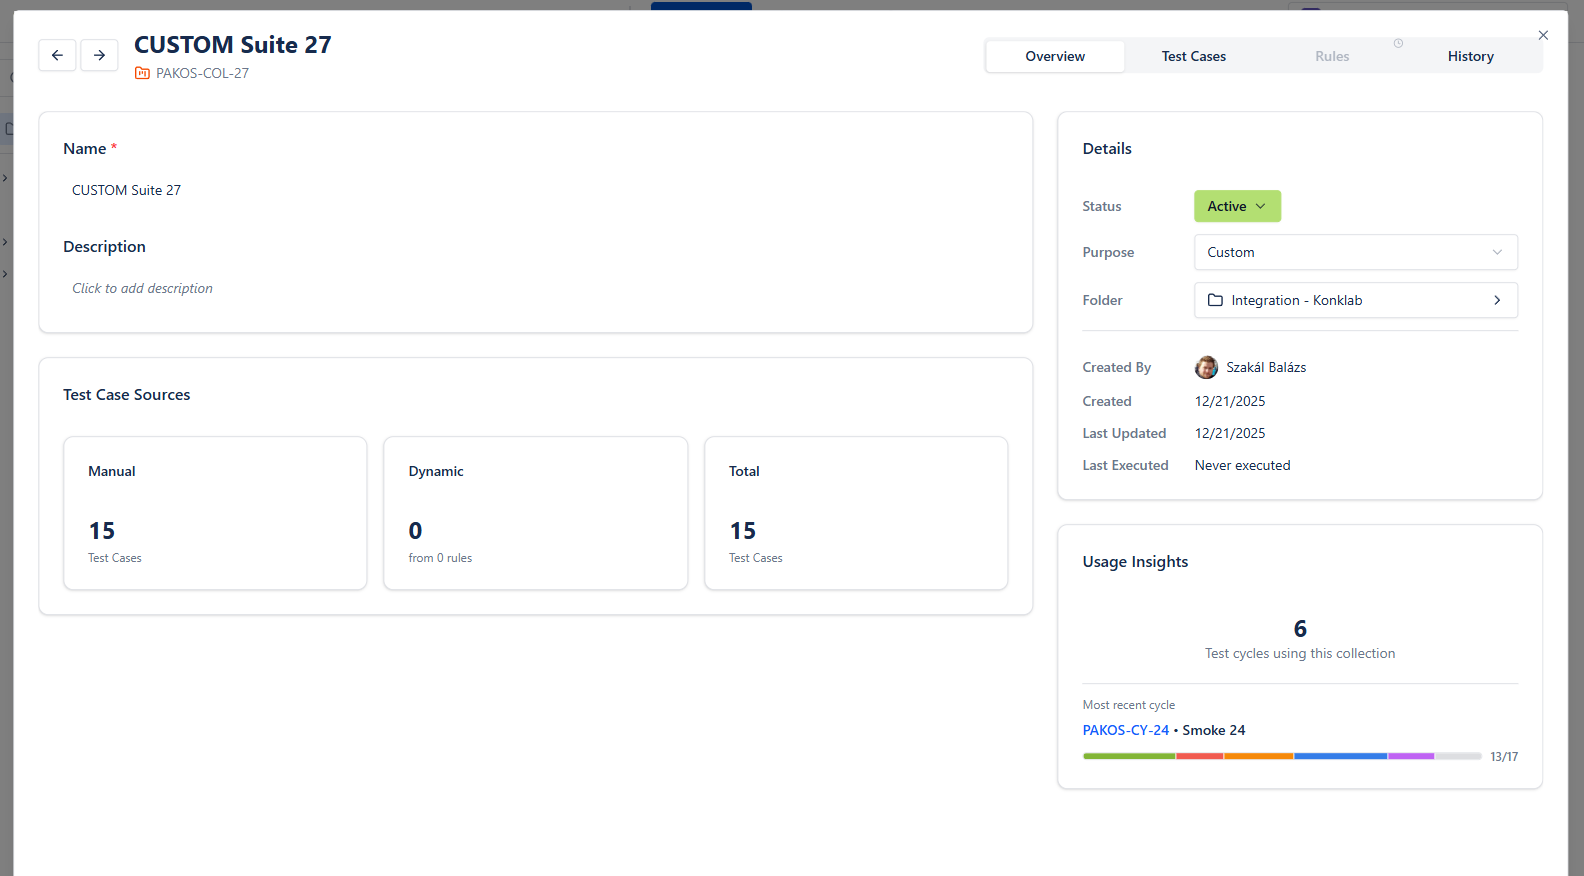
Start by adding test cases to cycles by hand. When patterns repeat (the same regression set every sprint), turn them into collections. The Smart Collections tutorial shows how.
What to Explore Next
You've installed BesTest, created a requirement and a test case, linked them, executed the test and reviewed the result. Next:
Grow the test suite
- 1List your Space's key features and workflows
- 2Create a requirement for each (bulk create helps)
- 3Write test cases until each requirement shows Covered - happy path, edge cases, error handling
- 4Plan cycles from requirements or collections
Put coverage on a Jira dashboard
Edit a Jira dashboard, add a BesTest gadget (for example Execution Overview or Requirement Coverage Breakdown) and choose its scope. Product owners then see testing status without opening BesTest. See Jira Dashboard Gadgets.
Add reviews and approvals
For UAT or regulated work, send test cases and requirements to one or more reviewers before they're used. Follow the test case review tutorial.
Recommended next reads
- •Creating Your First Test Cycle - plan, run and report a full cycle
- •Requirements Traceability in BesTest - coverage and release decisions
- •UAT in Jira: User Acceptance Testing Guide - run UAT cycles with BesTest
Set a goal: 10-20 test cases covering your most critical workflows, linked to requirements, and one full test cycle. That's enough real experience to decide how to scale.
Frequently Asked Questions
How long does BesTest take to set up?
Under 15 minutes. Installing from the Atlassian Marketplace takes about a minute, enabling BesTest on a Space is one switch for a Space admin, and creating your first requirement, test case and execution takes the rest. There is no infrastructure to deploy - BesTest is built on Atlassian Forge and runs inside your Jira.
Does BesTest work with Jira Cloud and Data Center?
BesTest is available for Jira Cloud. It's built on Atlassian Forge, Atlassian's cloud app framework. Check the Atlassian Marketplace listing for the latest platform availability.
Is BesTest free?
BesTest is free for teams of up to 10 users, with every feature included - requirements, test cases, test cycles, Smart Collections, dashboard gadgets and reporting. Larger teams pay per user through the Atlassian Marketplace; see the [pricing page](/pricing/).
Can I import test cases from other tools?
Yes. BesTest imports test cases and requirements from CSV or Excel, with validation before anything is created, so you can move over from spreadsheets or another test management tool. See [Import, Export](/docs/other-features/import-export/) for the templates.
Does BesTest create Jira issues for test cases?
No - by design. BesTest stores requirements, test cases and executions as its own entities, not as Jira issues. That avoids the "issue bloat" where thousands of test case issues clog your backlog, slow down JQL and confuse sprint planning. You still see and link everything from Jira, and bugs you log from a failed test are real Jira work items.
Ready to Get Started?
Install BesTest from the Atlassian Marketplace and set up your first test case in minutes. Free for up to 10 users.
Install BesTest Free